
설치부터 첫 검색까지, 5분이면 충분합니다
Findex를 처음 실행하면 초기 설정(온보딩) 창이 자동으로 열립니다. 화면에 나오는 순서 그대로 언어 → 창 모드 → 문서 폴더 → AI 비서 → 준비 단계를 따라가면 바로 검색을 시작할 수 있습니다. 1.2부터는 가벼운 온라인 설치와 자동 업데이트도 함께 제공됩니다.
STEP 1
다운로드와 설치
다운로드 페이지에는 두 채널이 있습니다. 정식은 검증이 끝난 안정 버전(1.1.x), 미리보기는 새 기능을 먼저 써 볼 수 있는 1.2 버전입니다. 이 가이드는 1.2 화면을 기준으로 합니다.
| 설치 파일 | 이럴 때 |
|---|---|
| 온라인 설치 (EXE, 약 25MB) | 인터넷이 되는 일반 PC. 작은 파일로 설치한 뒤 첫 실행 때 나머지 구성 요소(Python 라이브러리, Node.js 런타임, 확장 서버, 문자 인식 모델)를 진행률을 보여 주며 내려받습니다. 중간에 끊겨도 다음 실행에서 이어받고, 취소·닫기 버튼으로 멈췄다가 나중에 계속할 수 있습니다. |
| 오프라인 설치 (EXE / MSI, 약 240~310MB) | 인터넷이 없는 PC, 폐쇄망, 여러 대에 배포할 때. 모든 구성 요소가 들어 있어 실행 즉시 준비됩니다. 한국어 환경에는 MSI, 그 외 언어에는 다국어 EXE가 기본 제안됩니다. |
- 설치 파일 다운로드다운로드 페이지에서 채널과 설치 파일을 고릅니다.
- 설치 파일 실행x86 기반 64비트(x64) Windows 10/11에서 실행합니다. ARM 기반 기기는 지원하지 않습니다. WebView2 런타임이 없으면 설치 과정에서 자동으로 함께 설치됩니다.
- Findex 실행설치가 끝나면 Findex가 실행됩니다. 온라인 설치본은 Findex 구성 요소 설치 화면에서 나머지를 내려받은 뒤, 처음 한 번만 초기 설정 창이 열립니다.
이후 업데이트는 자동입니다. 새 버전이 나오면 앱이 배너와 헤더의 업데이트 칩으로 알려 주고, 바뀐 부분만 받아 적용한 뒤 재시작합니다. 확인 주기와 수동 확인은 설정 → 정보 → 업데이트에서 관리합니다.
STEP 2
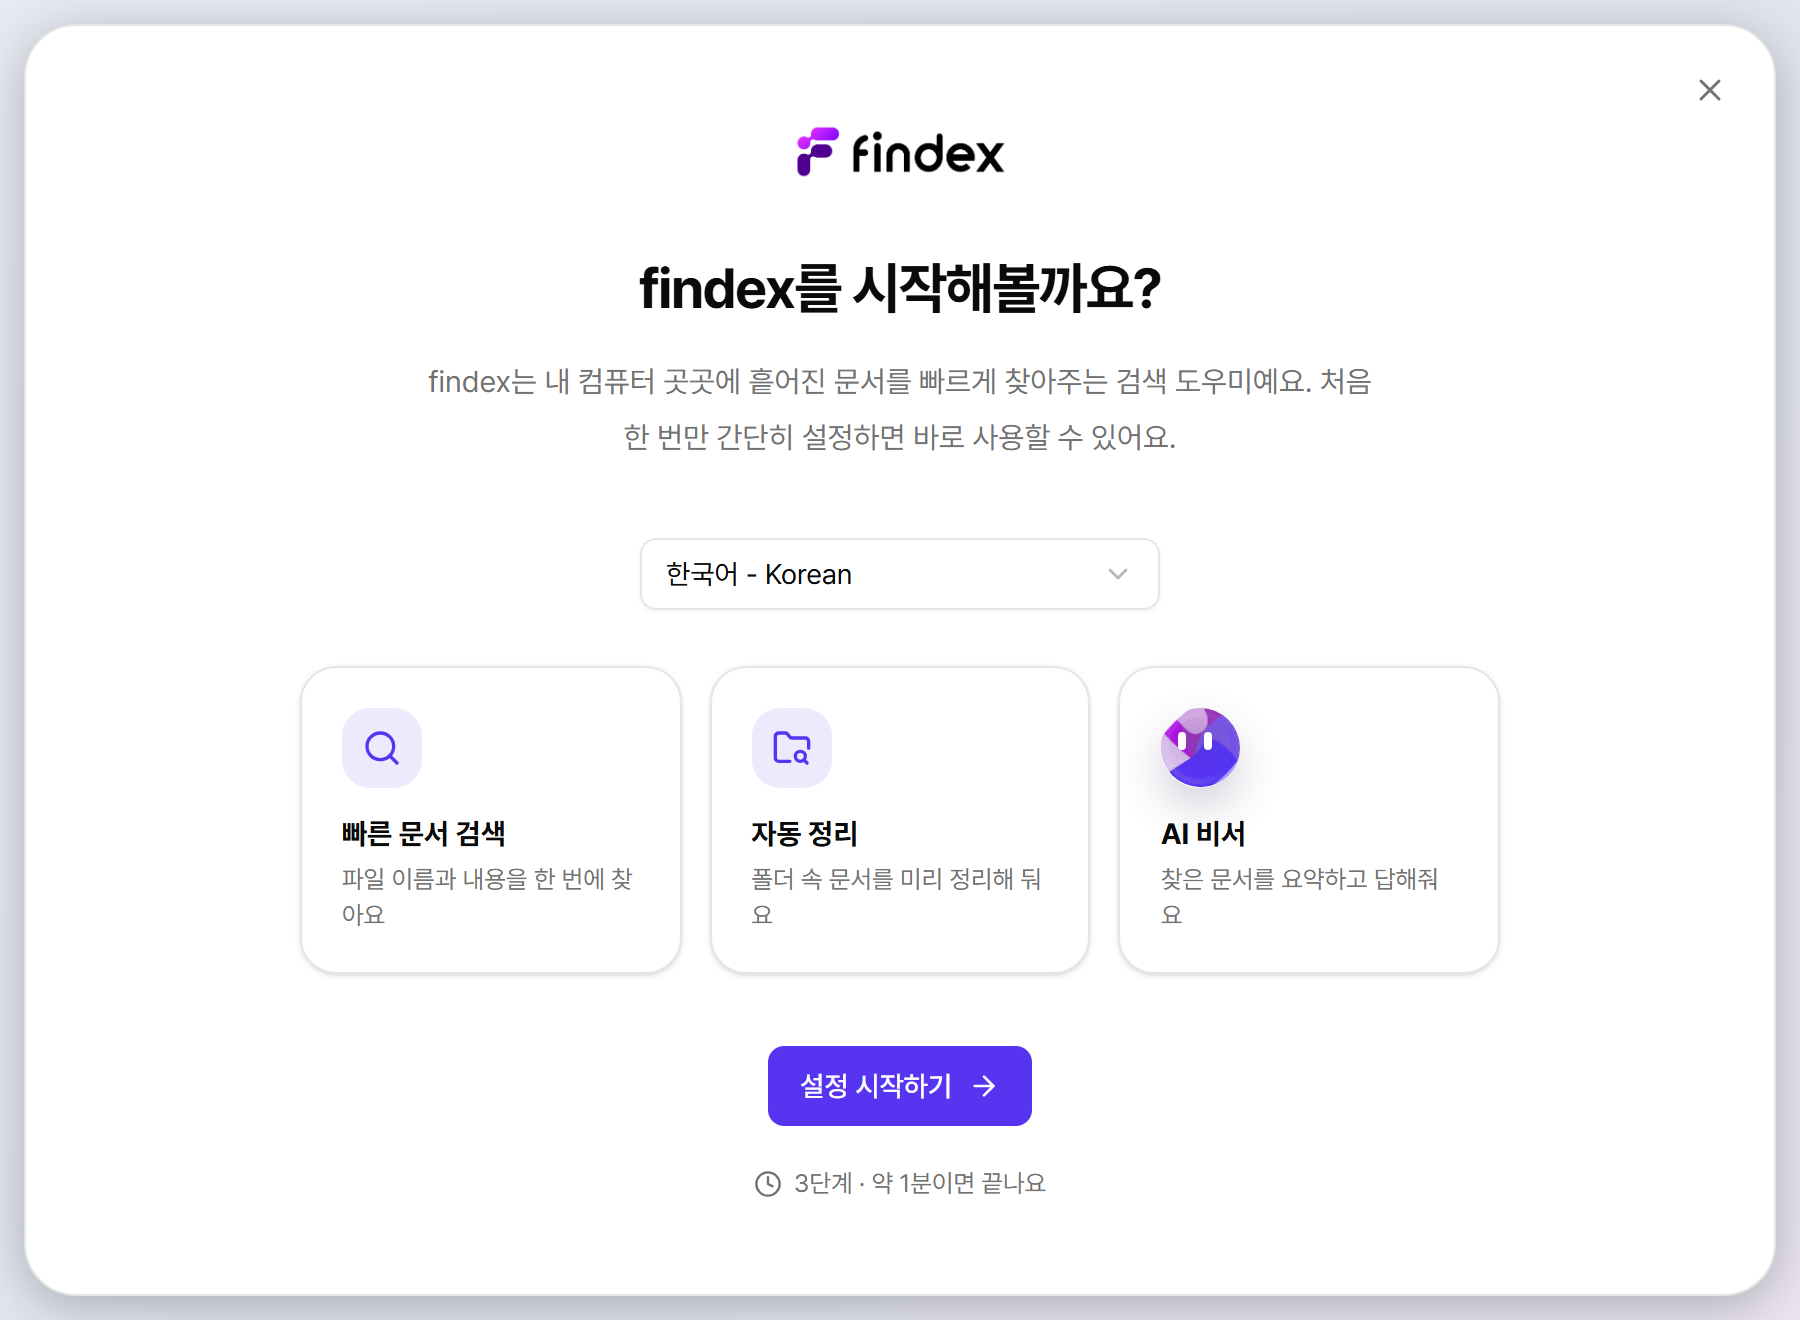
환영 화면에서 언어 선택
첫 화면에서는 Findex가 어떤 일을 하는지 소개하고 표시 언어를 선택합니다. 한국어, English, 日本語 등 12개 언어를 지원하며, 여기서 고른 언어는 프로그램 전체 UI와 알림, Luna의 답변 언어에 적용됩니다. 나중에 설정 → 기본 탭에서 언제든 바꿀 수 있습니다.
STEP 3
간편 모드와 일반 모드 중 선택
Findex를 어떤 형태로 열지 정합니다. 두 모드 모두 빠른 검색과 정밀 검색을 제공하지만 화면 구성과 창 동작이 다릅니다. 1.2부터는 일반 모드가 먼저 선택되어 있습니다. 선택은 저장되며, 나중에 헤더의 모드 전환 토글이나 설정 → 기본 → 창 및 실행에서 언제든 바꿀 수 있습니다.
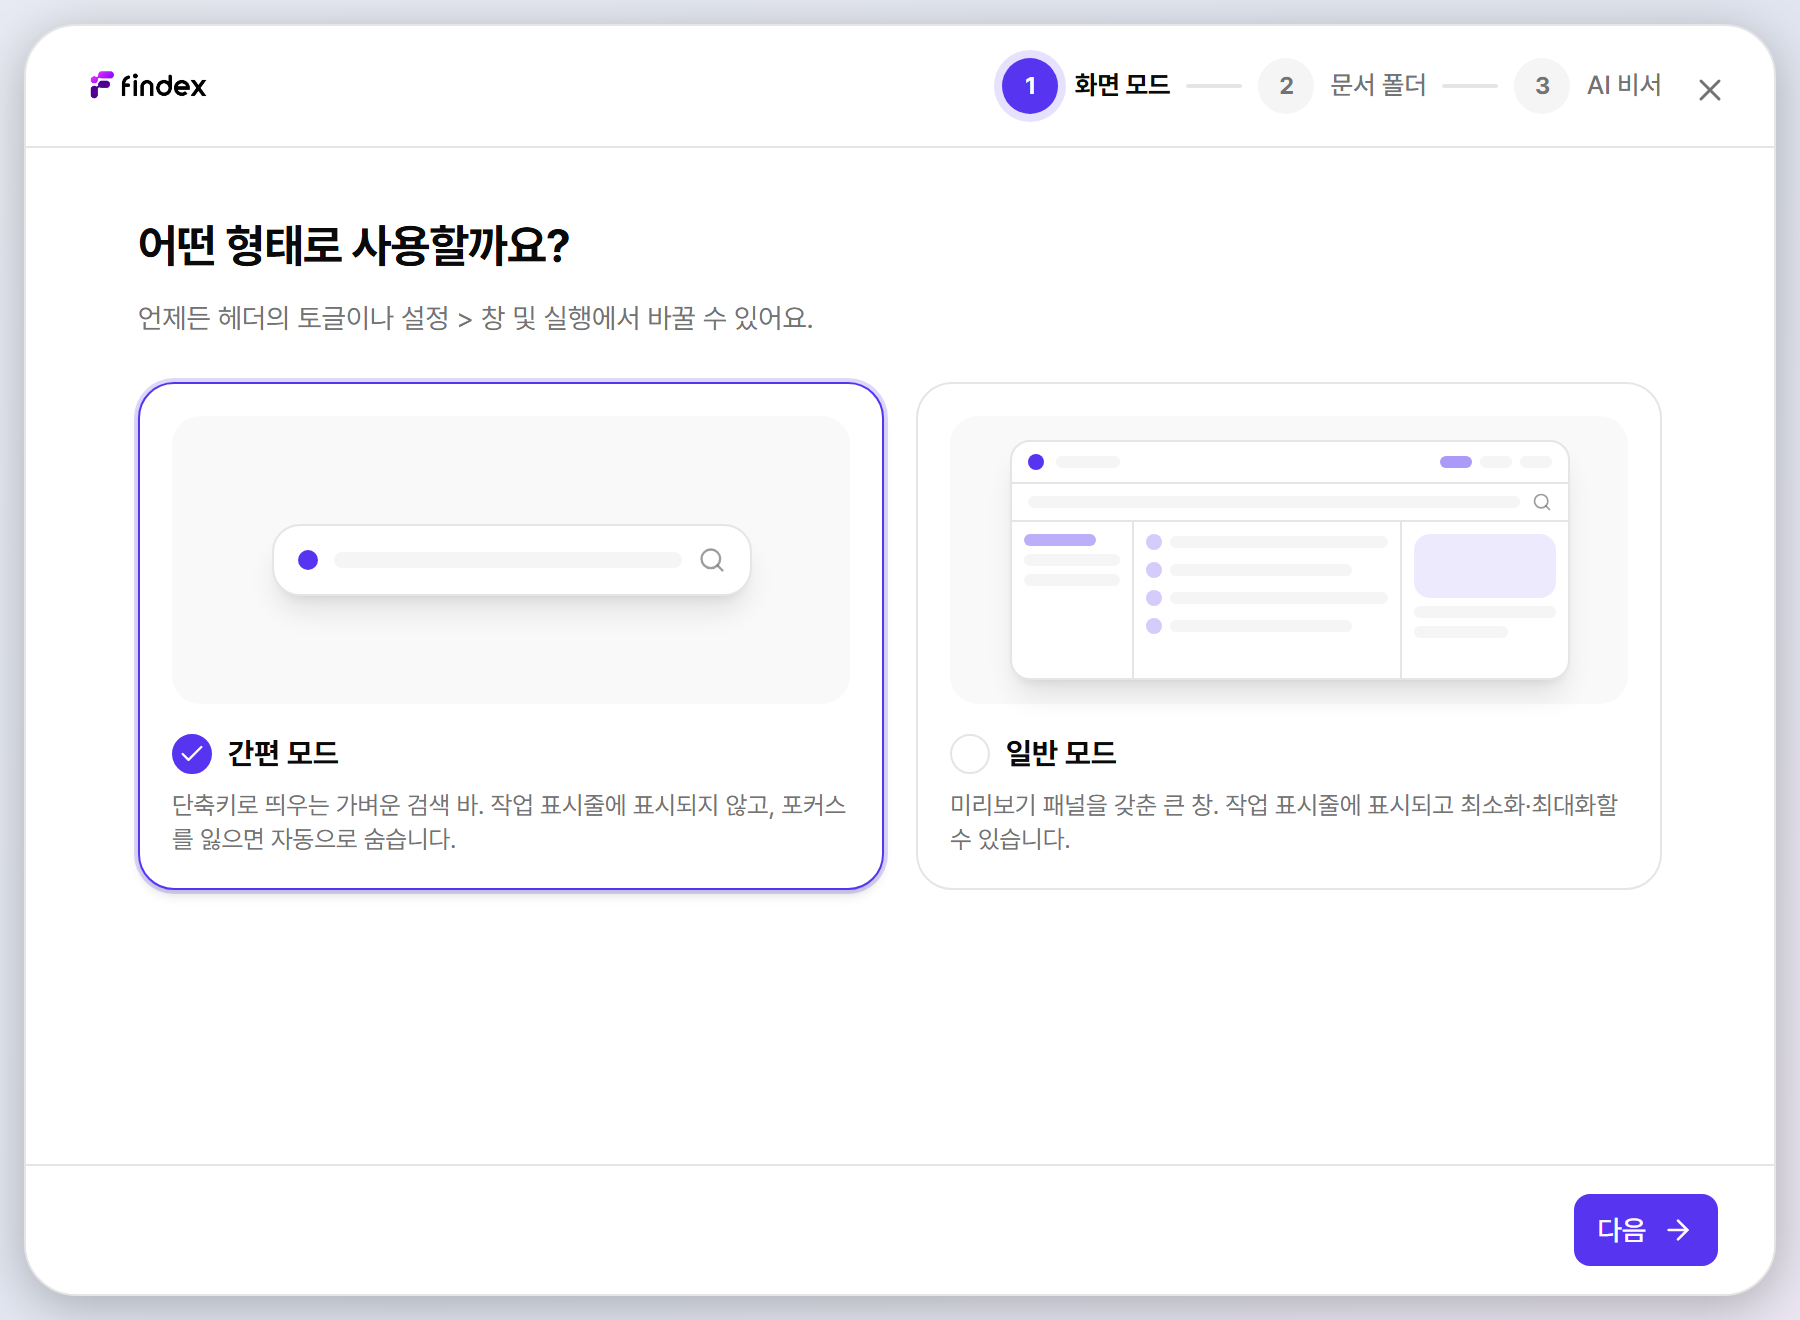
간편 모드
단축키로 부르는 가벼운 검색 바입니다. 포커스를 잃으면 자동으로 숨습니다. 작업 표시줄 표시와 항상 위 유지는 설정 → 기본에서 따로 정합니다.
일반 모드
필터·최근 문서·미리보기 패널을 갖춘 큰 창입니다. 작업 표시줄에 표시되고 최소화·최대화할 수 있으며 포커스를 잃어도 유지됩니다.
STEP 4
문서 폴더 선택 — 가장 중요한 단계
Findex가 어떤 폴더의 문서를 찾아줄지 정하는 단계입니다. 폴더 추가하기를 눌러 문서가 실제로 저장된 폴더를 하나 이상 선택하세요. 선택한 폴더는 “감시 폴더”가 되어, 안에 있는 문서가 자동으로 인덱싱되고 이후 파일이 바뀌어도 자동으로 반영됩니다.
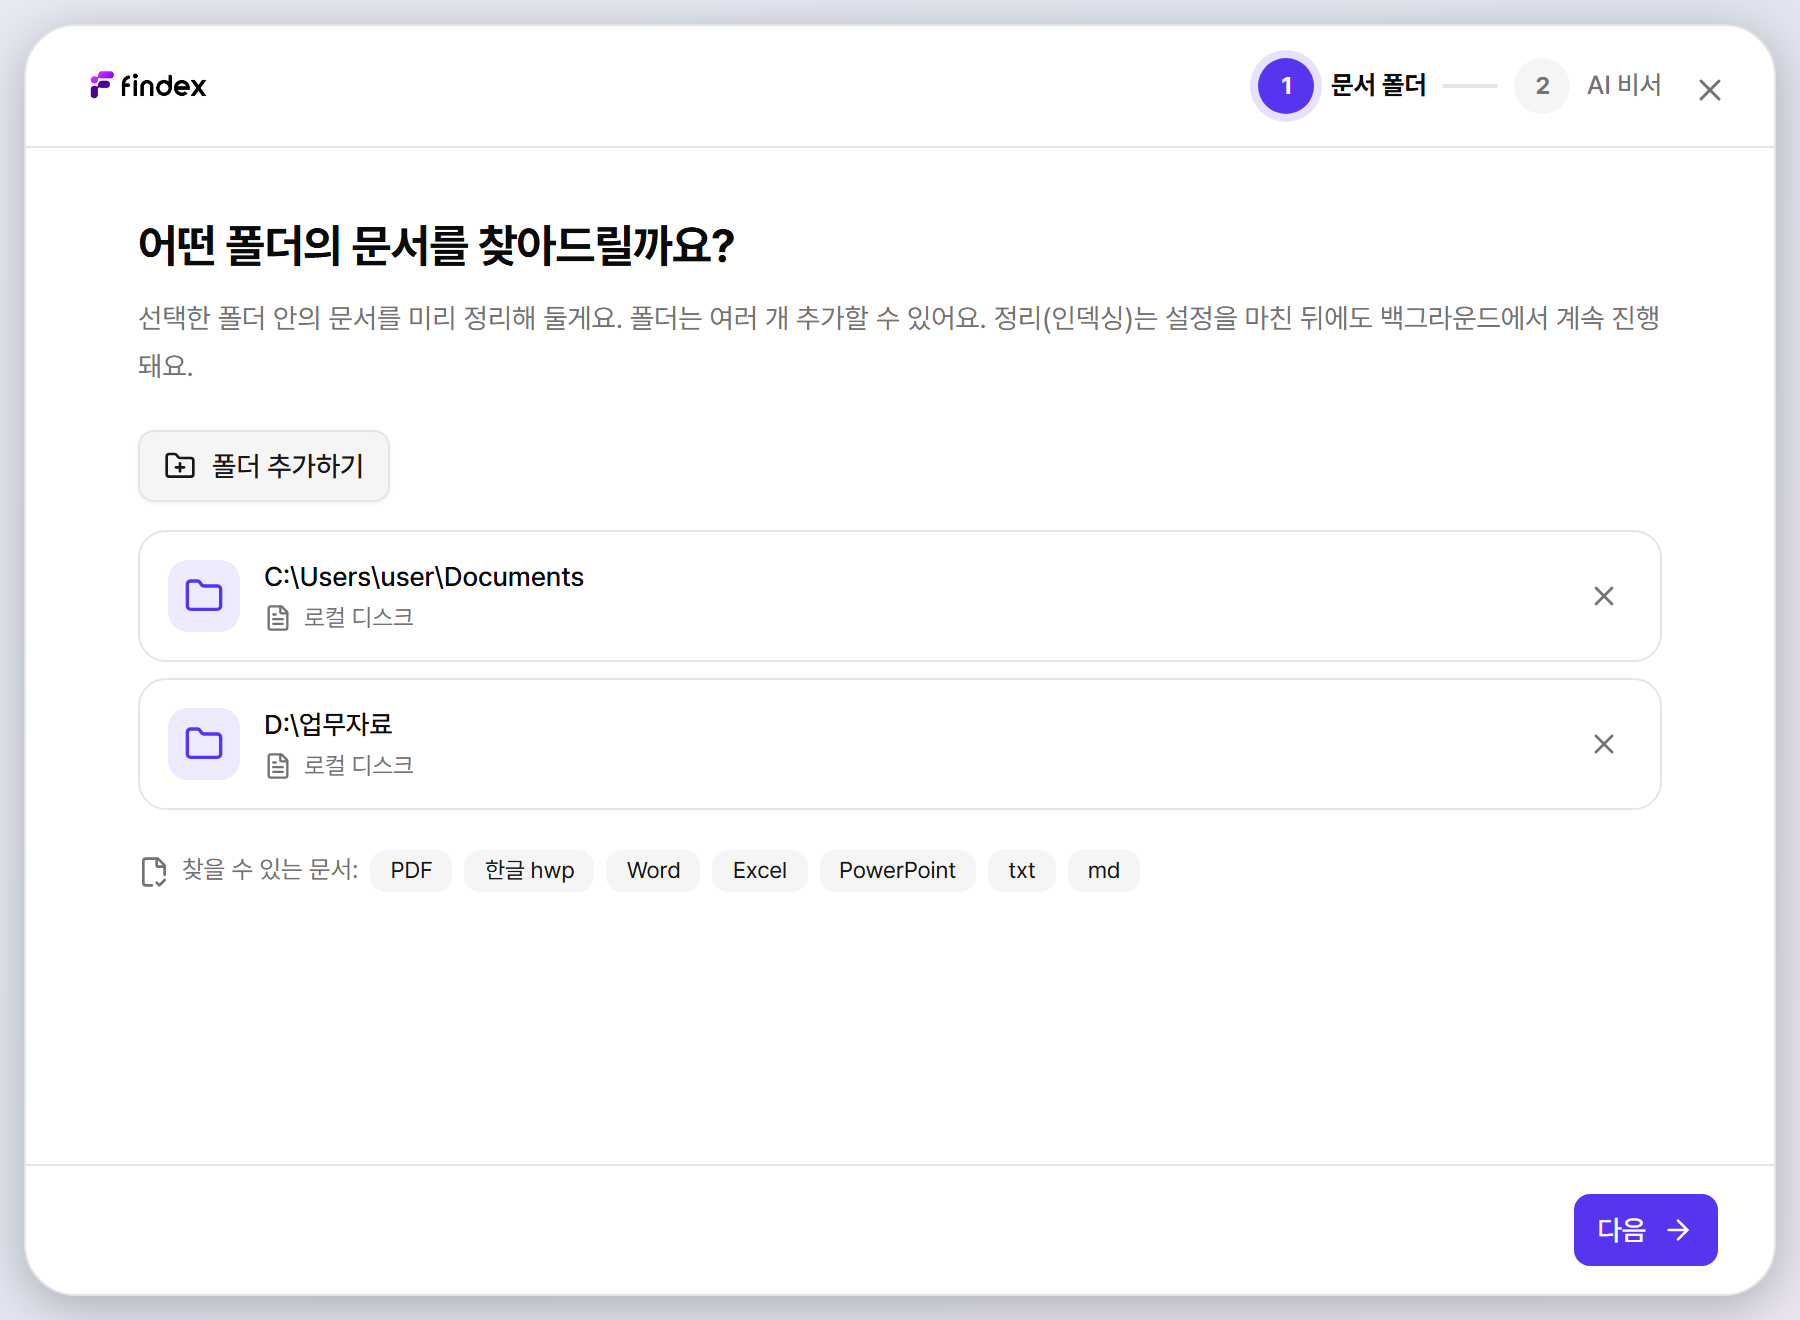
어떤 폴더를 고르면 좋을까요?
- 권장: 문서 폴더(내 문서), 업무 자료 폴더처럼 문서가 모여 있는 루트 폴더.
- 피하세요: C:\ 전체나 드라이브 루트. 처음 스캔이 매우 길어지고 불필요한 파일까지 검색 대상이 됩니다.
- 네트워크 폴더(NAS 등): 등록은 가능하지만 첫 동기화가 오래 걸릴 수 있고 변경 감시가 제한될 수 있습니다. 변경이 잘 반영되지 않으면 설정 → 엔진에서 수동 스캔을 실행하세요.
폴더는 나중에 설정 → 감시폴더 탭에서 자유롭게 추가·삭제할 수 있으니 부담 없이 시작하세요.
STEP 5
AI 비서 연결 (건너뛰어도 됩니다)
Luna(AI 비서)와 AI 기반 기능을 쓰려면 LLM을 연결합니다. 이 단계는 선택입니다 — AI 비서 없이 시작을 누르면 건너뛸 수 있고, 빠른 검색·정밀 검색은 LLM 없이도 완전히 동작합니다.
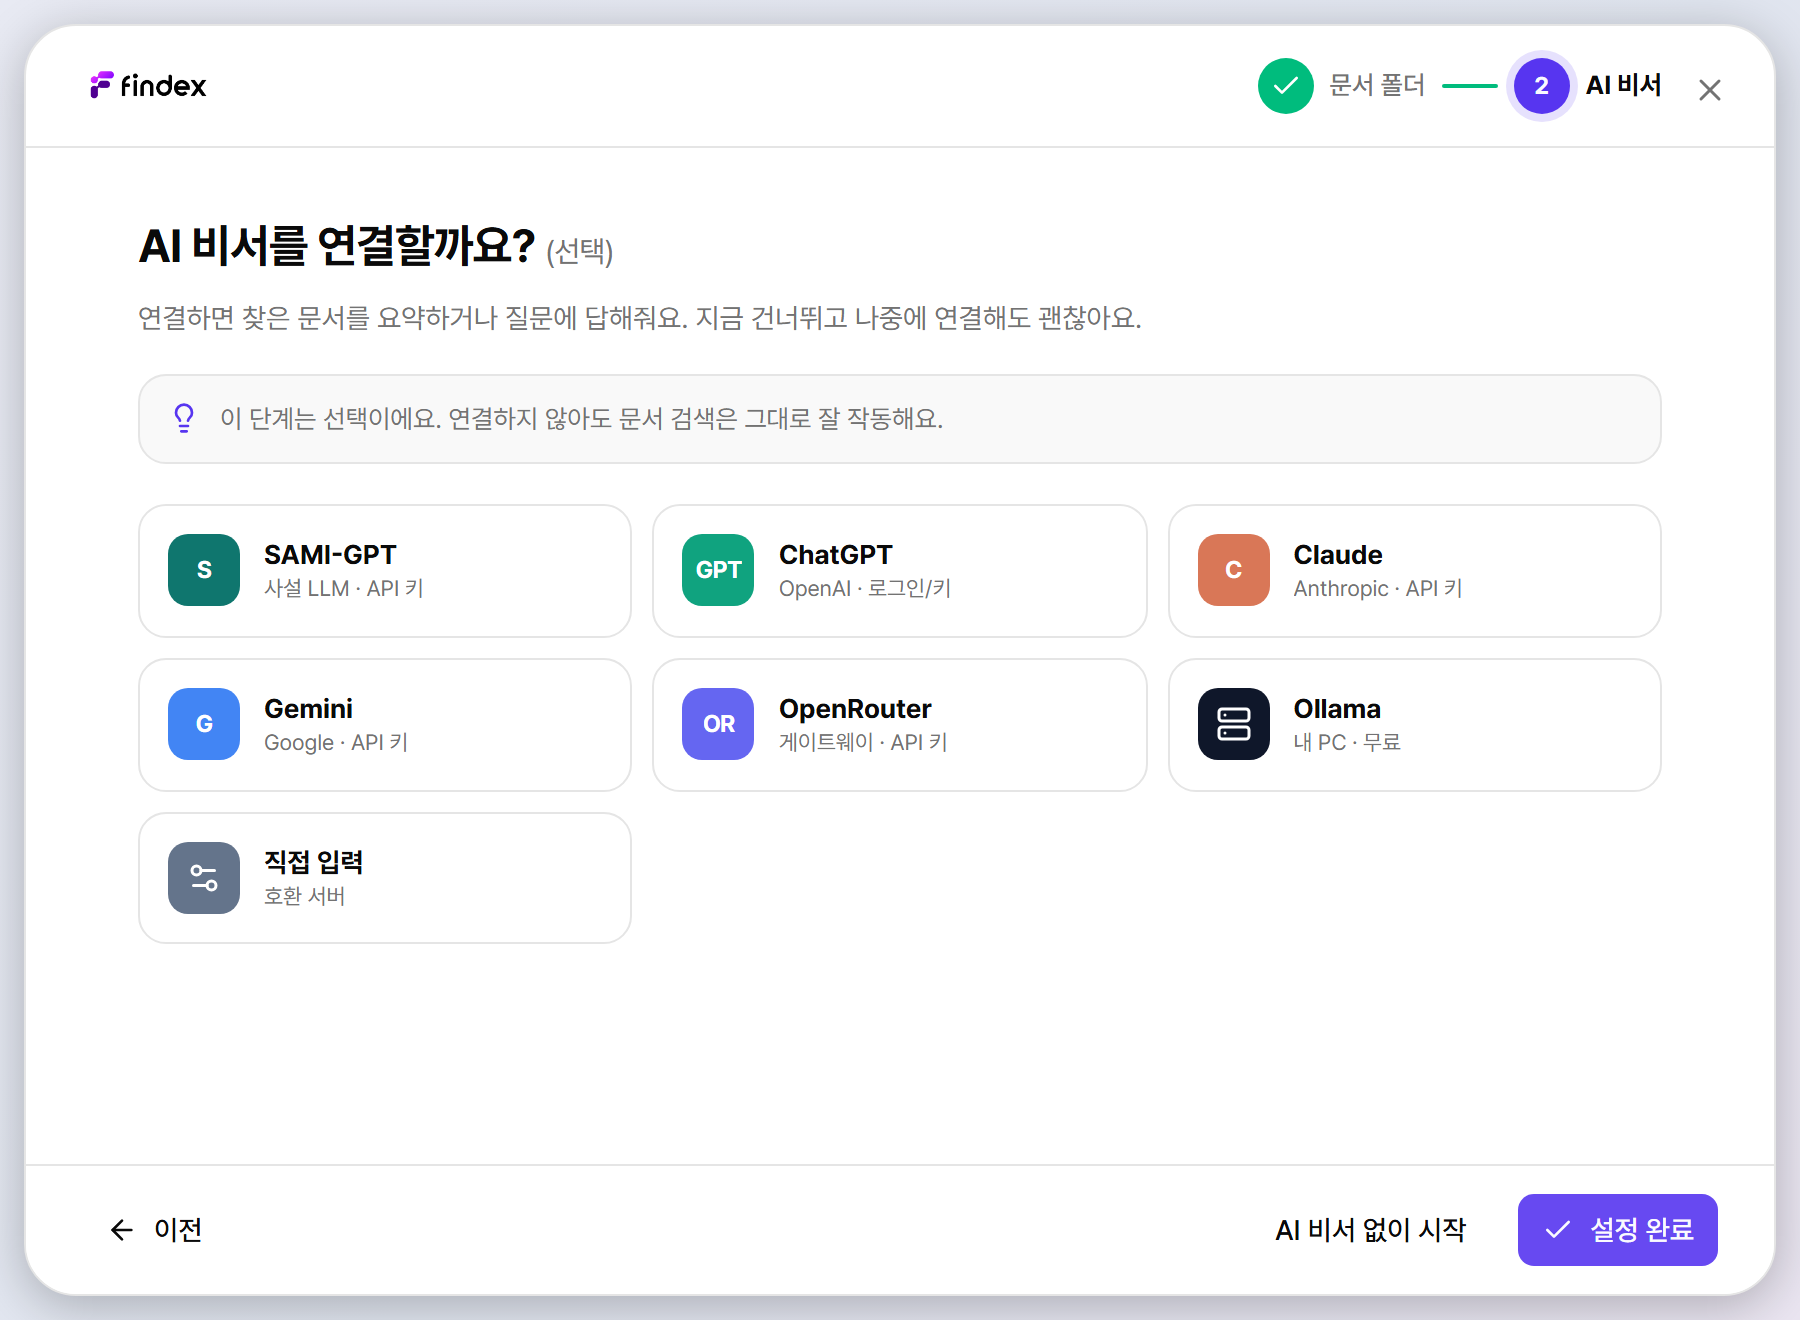
지원하는 제공자는 다음과 같습니다. 회사 보안 정책에 따라 클라우드 대신 PC에서 실행하는 로컬 모델(Ollama, LM Studio)을 선택할 수도 있습니다.
| 제공자 | 유형 | 연결 방법 |
|---|---|---|
| SAMI-GPT | 사설(직접 연결) | 기본 URL + API 키 입력 |
| OpenAI | 클라우드 | API 키 또는 ChatGPT OAuth 로그인 |
| Claude | 클라우드 | API 키 |
| Gemini | 클라우드 | API 키 |
| OpenRouter | 게이트웨이 | API 키 |
| Ollama | 로컬 | 내 PC에서 실행 중인 Ollama에 연결 |
| LM Studio | 로컬 | 내 PC에서 실행 중인 LM Studio에 연결 |
| OpenAI-compatible | 직접 입력 | 호환 서버의 주소를 직접 입력 |
STEP 6
준비 단계 — 엔진 시동과 인덱싱 시작
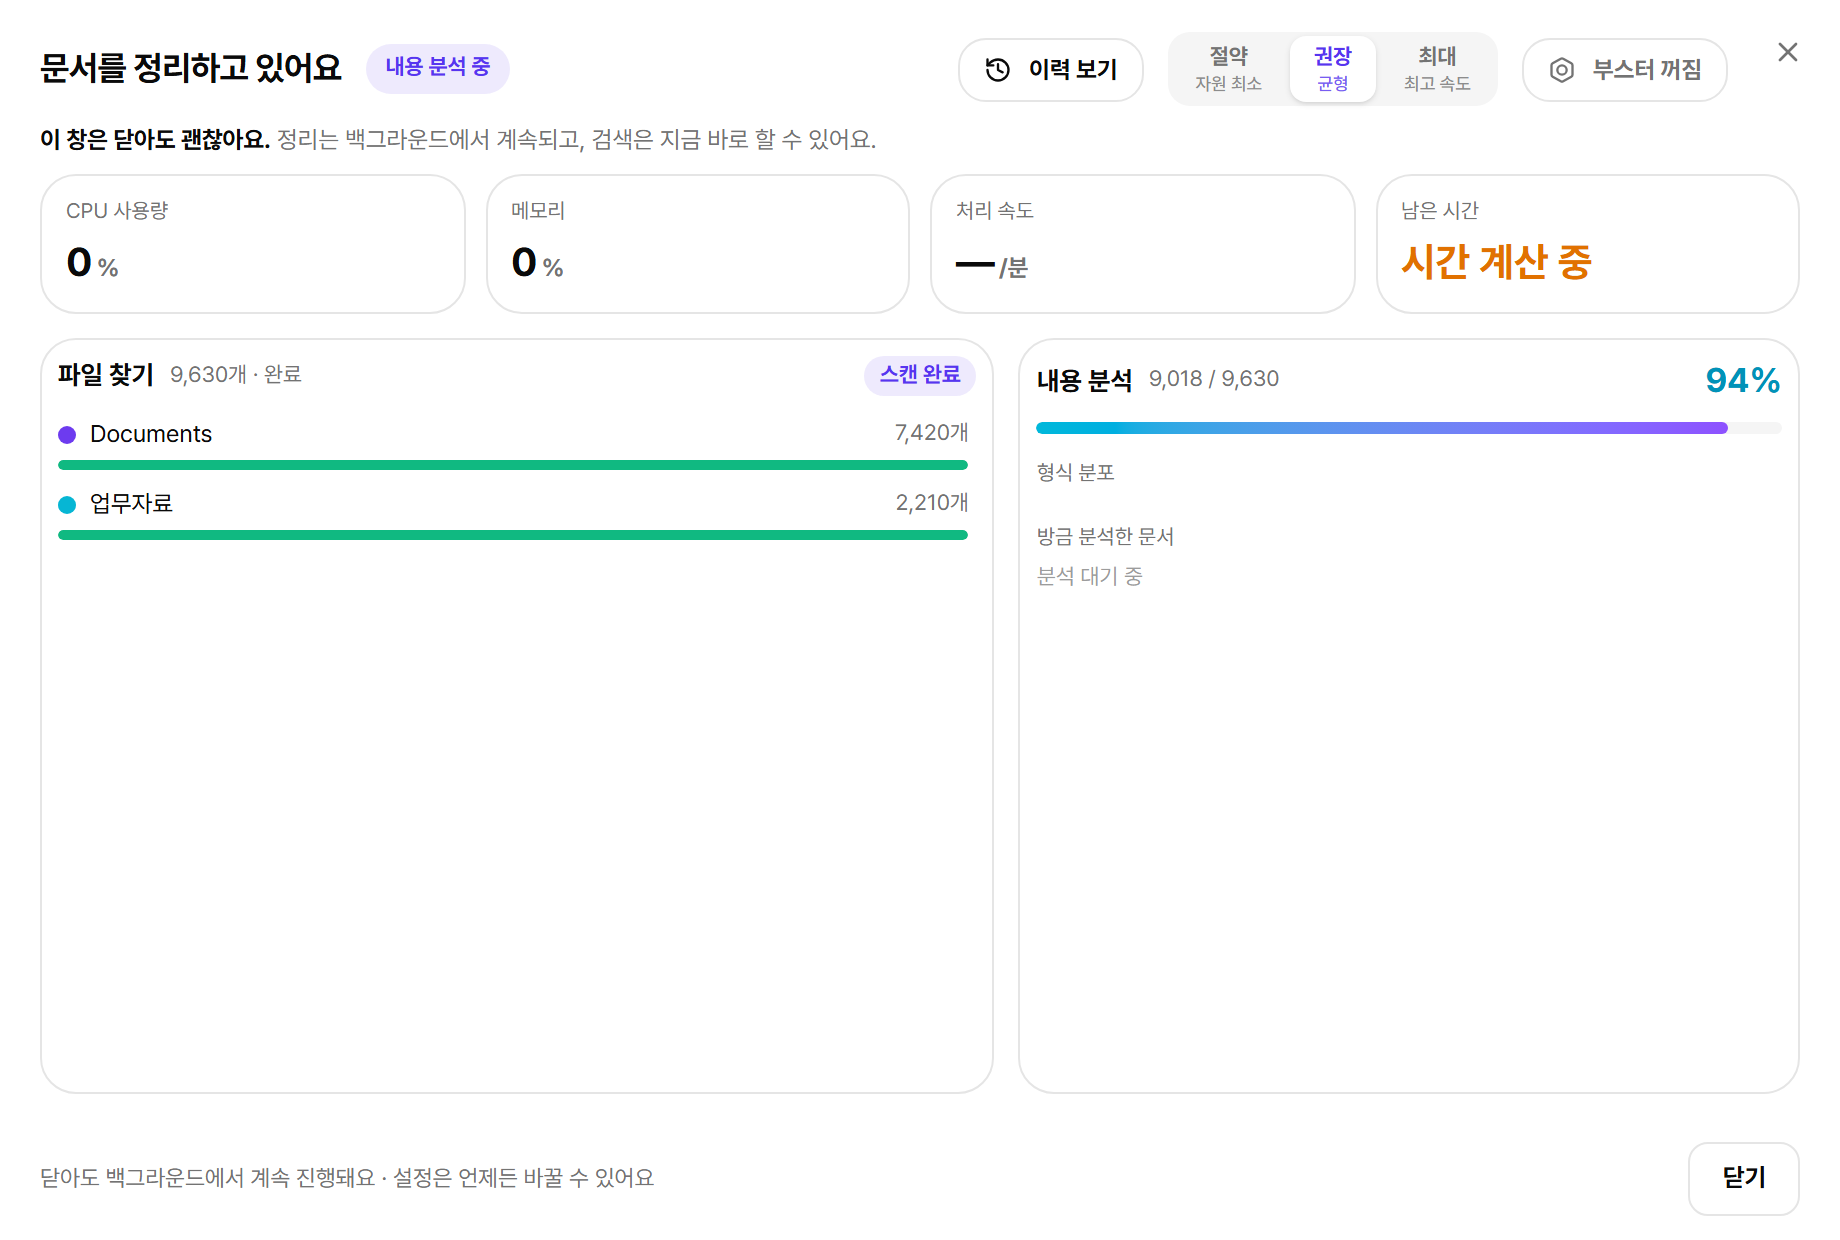
설정을 마치면 Findex가 검색 엔진을 깨우고 문서 색인 공간을 준비합니다. 준비가 끝나면 findex 시작하기 버튼으로 메인 검색창으로 이동합니다. 문서 인덱싱은 백그라운드에서 계속 진행되므로 기다릴 필요가 없습니다 — 인덱싱 중에도 검색은 바로 사용할 수 있고, 진행될수록 정밀 검색 결과가 점점 풍부해집니다.
STEP 7
첫 검색 해보기
설정이 끝나면 화면 어디서든 Ctrl+Shift+F를 눌러 Findex를 여세요. 간편 모드는 얇은 입력창에서 시작해 검색 결과와 함께 커지고, 일반 모드는 필터·최근 검색·최근 문서가 있는 커맨드 센터로 바로 열립니다.
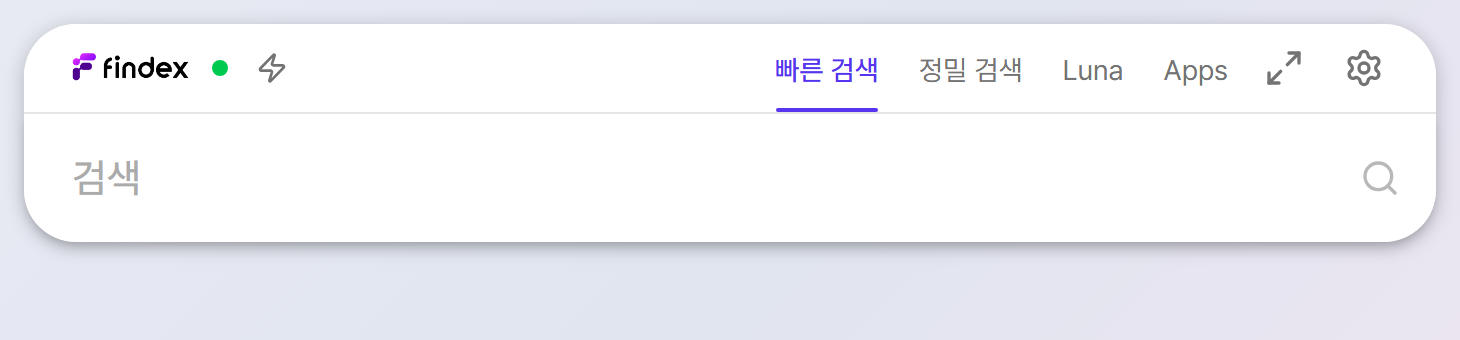
- 두 글자 이상 입력하면 결과가 실시간으로 갱신됩니다.
- ↑/↓ 방향키로 결과를 이동하고 Enter로 파일을 엽니다.
- Esc는 열린 필터를 먼저 닫고, 필터가 없으면 현재 창을 숨깁니다. 창 모드는 바뀌지 않습니다.
STEP 8
트레이 아이콘과 단축키 이해하기
Findex는 창을 닫아도 종료되지 않고 시스템 트레이(작업 표시줄 오른쪽 아래)에 상주합니다. 그래서 언제든 단축키로 즉시 부를 수 있습니다.
- 트레이 아이콘 클릭: 검색창 표시/숨김 전환
- 트레이 우클릭 메뉴: 열기, 설정, 종료
- 단축키 변경: 설정 → 기본 → 글로벌 단축키에서 원하는 조합으로 변경
- 자동 실행: 설정 → 기본 → “로그인 시 Findex 자동 실행”을 켜면 부팅 후 트레이에서 조용히 시작합니다.
여기까지 끝났다면 준비 완료! 이제 검색 챕터에서 빠른 검색과 정밀 검색을 제대로 활용하는 방법을 알아보세요.